Dark Chocolate Apricot Bars
Inspired by Carla over at The Bee’s Knees Kitchen, I have been making tonnes of delicious raw cheesecakes all week (much to the delight of my hungry household). Rawness has become a bit of an obsession with me lately, I’ve been spending sleepless nights drooling over hundreds of incredible sounding recipes. Cinnamon ice cream, spicy samosas, stuffed vine leaves and even raw bread…. And It’s all good for me too, as the recipes are mostly vegan and gluten free. Woop woop.
These yummy bars are not entirely raw because of the chocolate but I’m not going to let that worry me. This is just a basic recipe that I’ve created, but you could mix it up anyway you like by changing the fruit and nuts or adding coconut and berries. Pretty much whatever takes your fancy. It’s amazing what you can do with a bag of old nuts and some dried fruit!
Ingredients
1/2 cup Dates
1/2 cup Dried Apricots
1/2 cup mixed Whole Cashews, Almonds and Brazil Nuts
1 cup Ground Cashews
1 tbs Agave Nectar
1tbs Water
pinch Salt
1 bar Dark Chocolate ( my bar was 125g)
How To Make
Blend the dates and apricots together in a food processor until they form a ball.
Remove the ‘fruit ball’ from the blender and place in a large mixing bowl along with the agave nectar, water, salt and ground cashews.
Put the mixed nuts into the food processor and blend for about a minute or less. The nuts still want to be a bit chunky to give the bars some CRUNCH.
Add these nuts to the rest of the ingredients in the bowl and mix it all together using your hands. This is a sticky job and takes a bit of time to get it all well combined.
Now spoon the mixture into a vessel of your choice, (I used a tupperware tub but you could use a baking tray or ceramic dish or anything) the larger the surface area, the thinner your bars will be so don’t go too big.
Stick in the fridge.
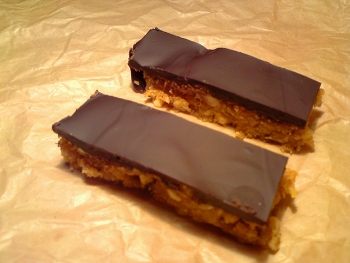
Melt the dark chocolate in a bain marie. Whip the fruity/nutty gunge out of the fridge and cover with the melted chocolate. Try to spread it evenly.
Stick the whole thing back in the fridge and wait for the chocolate layer to solidify.
Now you can slice it into bars and begin the feast.
(To make a bain marie, fill a saucepan half way with water and place a bowl inside so that it doesn’t touch the bottom of the pan but is resting in the water. Stick on the stove and turn on the heat. Put the broken up chocolate into the bowl and stir with a wooden spoon till all is melted. If you just melted the chocolate directly in the pan it would burn.)
Chickpea and Pomegranate molasses Salad
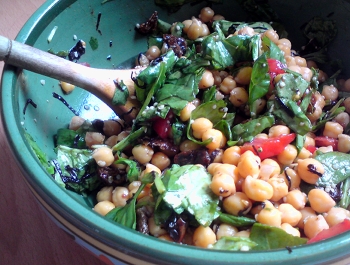
Salads are great. Here is one I made earlier.
Ingredients
soaked and cooked Chickpeas
chopped Spinach
chopped Tomatoes
chopped Dates
finely shredded Nori Seaweed
shelled Hemp Seeds
For The Dressing
Olive Oil
Lemon juice
Tamari
Pomegranate Molasses
Sea Salt
How To Make
Stick all the top ingredients in to a big bowl and mix them up.
Put the ingredients for the dressing in a jar and give it a shake.
Pour the dressing over the salad and stir it all up.
The End
Sprouted Chickpea Humus
Recently I heard about a restaurant in London where you can eat Raw Cake! Amazing I thought, how could this be? So I set about educating myself in all things RAW. I’ve been learning about all sorts of things like dehydrators and enzymes and have come across some interesting recipes too. So I decided to start my little foray in to raw foodism with a nice friendly humus, nothing too taxing or scary and I have been pleasantly surprised! I confess that this recipe is not entirely raw as I used roasted sesame tahini, because thats what I had in my cupboard. But hey its near enough. The humus has a definite green and healthy flavour to it, but I really liked it, so here it is…….
Ingredients
2 cups Sprouted Chickpeas
2 to 3 cloves Garlic, finely chopped
juice of 1 Lemon
1/3 cup Olive Oil
1/2 cup Tahini (more or less depending on how thick you want your humus to be)
large pinch Sea salt
2 tsps Cumin seeds
1 tsp Ground Coriander
How To Make
Place the chickpeas in to a food processor along with the garlic and blitz to a pulp.
In a small bowl or glass, add the lemon juice, salt and olive oil and stir. Now add this to the chickpea mixture in the processor and mix again.
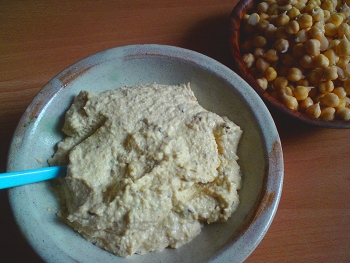
Pour in the tahini slowly and watch as it thickens up the humus, the more tahini you add the thicker the humus will be.
Dry fry the cumin seeds in a pan until they start to pop and the fragrance comes out. Add these and the ground coriander to the humus.
Stick your finger in and see what you think…..you can always add more oil or salt or lemon to suit your own tastes.
Eat with whatever takes your fancy!
N.B If you do not have a food processor you can use a blender and a bowl instead. Or give your arms a good work out and use a fork, although this might take a while as the raw chickpeas are quite tough.
Dark Chocolate Marzipan Balls
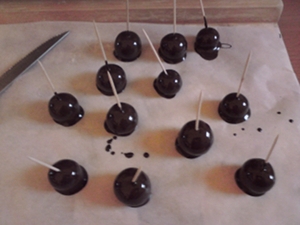
This is not really a recipe at all. But, Marzipan and dark chocolate……..I haven’t specified quantities because you can make as much or as little as you like really.
Ingredients
1 quantity Marzipan (make sure it is egg free)
1 bar Dark Chocolate for cooking
1 packet of Cocktail sticks
How To Make
Break off small amounts of the marzipan, and roll into balls, roughly the size of a cherry.
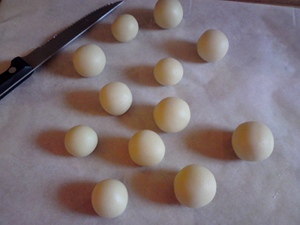
Lay the balls out on a sheet of grease proof paper, and push a cocktail stick into the centre of each ball.
Find a saucepan and pyrex bowl which fits into the top. Fill the saucepan with about 2 inches of water, and place the bowl into the pan, so that the water level rises slightly around the bowls base. Turn on the heat and keep it on low.
Break off chunks of dark chocolate into the bowl, stir occasionally, and wait till all the chocolate has melted.
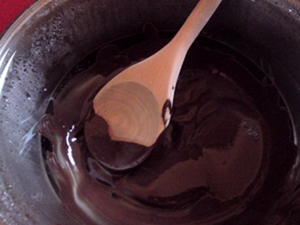
Now for the fun part! pick up a marzipan ball by its cocktail stick and swirl it around in the chocolate so it is totally covered – you may need to use a spoon to help with this. Once done, place back onto the grease proof paper and repeat till all your marzipan balls are covered in lovely chocolate.
Now repeat again, dipping each ball into the chocolate to give it an extra thick layer of chocolate.
Finally, place all the balls onto a plate and refrigerate for around 15 minutes, till the chocolate coating is hard.
Lovely Deliciousness!!
Apple, Cinnamon and Banana Loaf
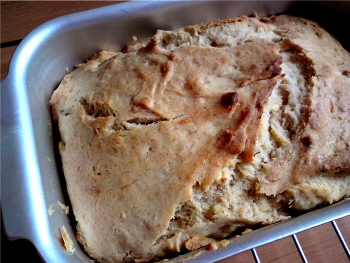
I can’t stop eating cake right now. All day I think about it, and then rush home to eat some, and bake another cake or loaf! I made this yesterday, and needless to say, it has been consumed within a matter of hours.
Ingredients
1/1/2 cup Gluten-free Plain Flour
1tsp Baking Powder
1/2 tsp Xanthum Gum
1 tsp Ground Cinnamon
3/4 cup Vegan Margarine
3/4 cup Unrefined Cane Sugar ( natural golden Castor sugar)
1/4 tsp Vanilla Extract
2 medium Apples
1 medium Banana
1/4 cup Water
extra Margarine for greasing
How To Make
Preheat oven to 180ºc. Grease a loaf tin with vegan margarine.
Cream together the margarine and sugar in a large bowl. Add the vanilla extract and mix thoroughly.
Sieve together the flour, baking powder, Xanthum gum and cinnamon. ensure it is all really well combined.
Peel and grate an apple and add this to the margarine and sugar mix, along with a mashed banana. Add the flour mixture to the margarine mixture and stir in till a thick batter is formed.
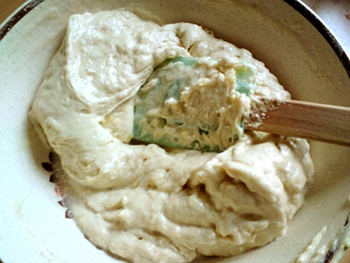
Now you will need to add roughly 1/4 cup of water til the batter is slightly runnier and less stiff.
Slice the last apple, lay the pieces in to the base of the greased loaf tin, pour over the batter and spread evenly with a spatula.
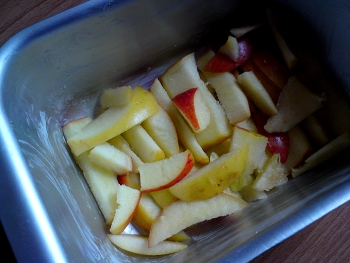
Stick in the oven, on the middle shelf for 40 minutes, or until an inserted knife or skewer comes out clean.
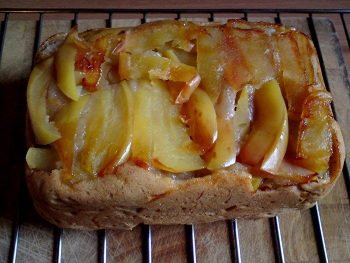
Leave to cool on a rack and turn out.
Plum and Almond Cake
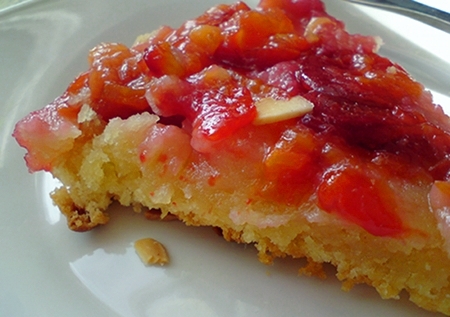
Cake Cake cake and more cake! I made this for my friends birthday present yesterday, and then couldn’t wait till I gave it to him, so I had to bake another one just so I could eat some. Yes, I know I’m greedy. But then, I don’t get to eat cake all that often, so i think its fair enough. The best thing is that said friend, on eating a slice of the birthday cake, announced “you’d never now it was vegan and gluten-free either”, or some such like that anyway. I’ve since been fantasising about making another version with apples and blackberries, or rhubarb and lemon or pear or argghhh the list could go on!
Ingredients
2/3 cup Vegan Margarine
2/3 cup Unrefined Cane Sugar (natural golden Castor sugar)
2/3 cup Gluten-free Plain Flour ( I use Doves Farm mix)
1/2 cup Ground Almonds
1/1/2 tsp Baking Powder
1 tsp Xanthum Gum
3 tbsp Egg Replacer
handful Flaked Almonds
extra Sugar for sprinkling
extra Margarine for greasing tin
How To Make
Preheat oven to 180ºc. Grease your cake tin or oven dish with the extra margarine.
In a large bowl, cream together the sugar and margarine till you have a light, smooth consistency.
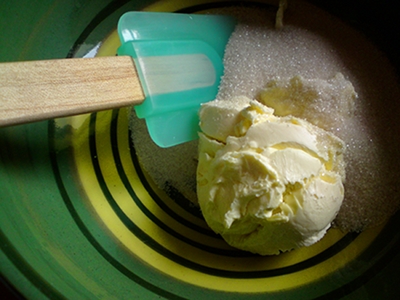
Sieve the flour, baking powder, Xanthum gum and egg replacer, into a separate bowl, and mix thoroughly. Add the flour mixture to the creamed sugar and margarine, and combine until smooth. Now add in the ground almonds.
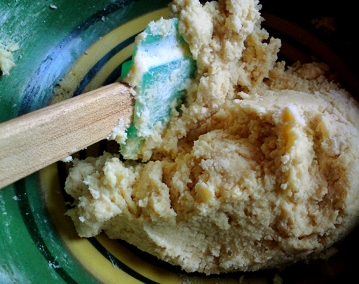
The ‘batter’ will be quite dry and slightly crumbly at this point, so you now want to add in roughly 1/2 cup of water until a smoother and more elastic ‘dough’ is reached.
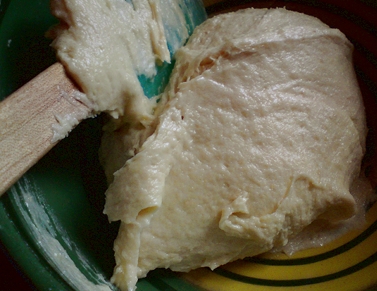
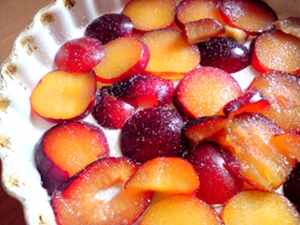
Set the ‘dough’ aside and slice the plums into halves and then again into flat slices or sections, which ever you like best.
Scatter the sliced plums over the bottom of the greased oven dish or cake tin that you are using, and sprinkle lightly with sugar.
( I have made this recipe in both a 6″ deep-sided cake tin and also a 9″ shallow ceramic Quiche dish and it worked well both times, but turns out slightly differently, so its up to you.)
Now you need to dollop the dough over the plums and spread it about with a spatula until the whole surface is covered. as the cake dough is quite ‘elasticky’ make sure not to move the plums about too much.
Finaly, sprinkle the surface with flaked almonds.
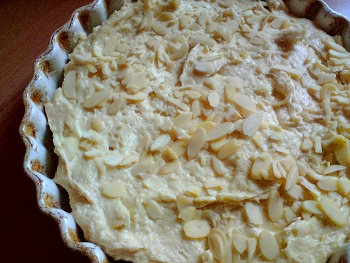
Stick in the middle of the oven for about 40 minutes, or until an inserted skewer or knife comes out clean.
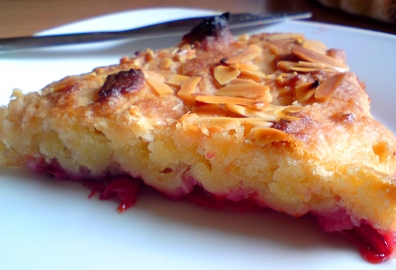
You can leave it with the ‘flaked almond side’ up, or turn it out so that the ‘plum side’ is showing, what ever you like best. Still tastes delicious all the same!
Pear, Vanilla and Fig Smoothie
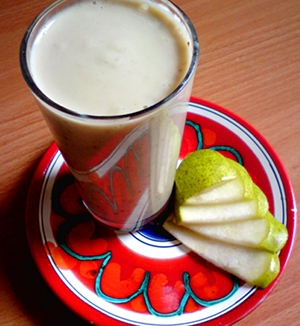
I woke up at about 3am this morning and had a craving for a big creamy smoothie – but I had to wait till a slightly more respectable hour before I got to make one for my breakfast. Luckily I wasn’t disappointed.
Ingredients
1 small Banana
1/2 ripe Pear
2 dried Figs
1/2 pint Soya Milk
dash Vanilla Extract
How To Make
Stick all the ingredients into a blender (or tall container if using a hand blender).
Blend well till there are no lumps left, you will still be able to see the tiny fig seeds but that is OK, they lend a nice contrasting texture to the thick creaminess.
Add in the soya milk and blitz again, then give it all a stir.
Finally, pour into a cup and DRINK!
Chestnut Truffles
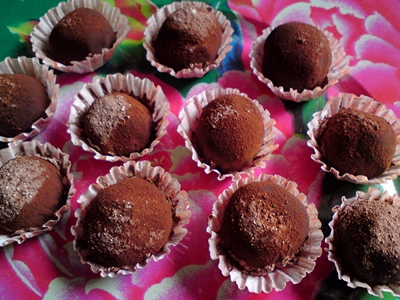
What do you do when you have a mysterious can of chestnut puree in the back of the cupboard? Invent some chocolate chestnut- truffles of course! These are very simple to make and will please even the hardiest of vegan-vilifiers.
Ingredients
1 can unsweetened Chestnut Puree (about 2 cups)
3 tbsp + 1 tsp Cocoa Powder
1/2 cup Icing- Sugar
a few drops vanilla extract
extra Icing Sugar and Cocoa for dusting
How To Make
Put all the ingredients in a large mixing bowl (except for the extra icing- sugar and cocoa for dusting).
Using a wooden spoon or spatula, mix all the ingredients together until well combined.
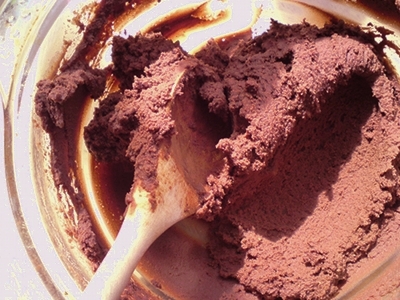
Now, cover the mixture in cling film (cellophane, saran wrap) and leave for at least half an hour to firm up. You can do this either in the fridge or (if where you live is cold enough), out on the counter.
When it’s time, sieve some cocoa powder and a small amount of icing- sugar onto a plate ( I used more cocoa than icing-sugar to dust with which gave a good bitter contrast to the sweet centre of the truffle). Using your fingers, break off a small lump of the truffle mix and roll it into a ball-ish shape in your hands. Finally, roll the ball in the cocoa/icing-sugar mix on the plate and now you have your very own Chestnut truffle!
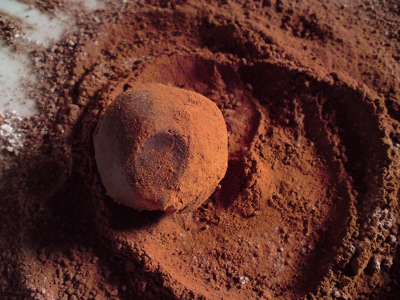
Repeat until all the mixture is used up, I made about twenty or so, but I’m not sure exactly, as I ate a few along the way. The truffles can keep in the fridge for a couple days if necessary.
Date Me Dumplings!
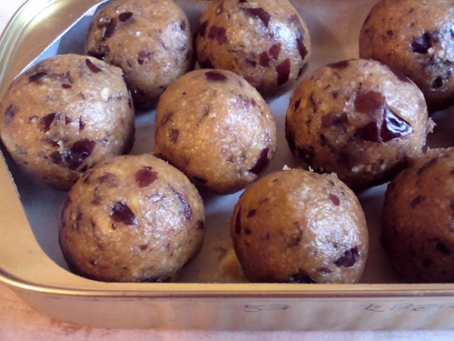
Oh the happiness such tiny things can bring! I have completely surrendered myself to these gooey-chewy balls of sweet deliciousness. Yum. If you like dates, and as far as i’m concerned you’d be mad not to, then you cannot fail to love these. There used to be an amazing South African Deli by the name of Ndbele, (in Edinburgh, Scotland). The first time I went there I was extremely happy to find a beautiful vegan sweet-potato cake, which tasted so good, that I phoned them a few days later and begged them for their recipe, but to no avail! They also made fantastic date balls, and so it is to them I owe my inspiration (and happiness) for the recipe below.
Ingredients
20 whole Dates ( I think Sun Dates are the best- they are gungy and taste like fudgy-toffee)

4 gluten-free plain Biscuits
vegan Margarine (if necessary)
(N.B. When I say ‘Biscuits’ I mean British biscuits, not American ones which are similar to English scones. I used some dry and crumbly gluten-free ‘Golden Crunch Biscuits’ that I bought in a moment of biscuit-needing desperation from a supermarket, and which turned out to be less than exciting on their own, but they worked perfectly for this recipe.)
How To Make
Remove the stones from the dates and chop the flesh and skins finely.
Mash lightly with a fork, until all the fruit has combined to a sort of sticky blob.
In a bowl, break up the biscuits and crumble to remove any large pieces.
Add the date mass to the crumbled biscuits and mix thoroughly.
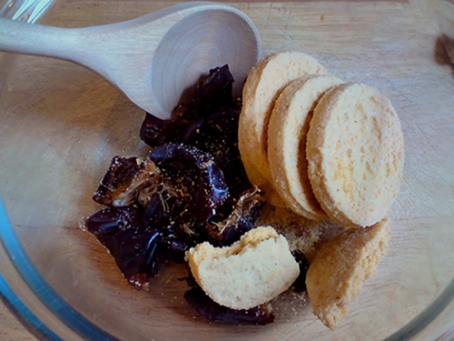
At this point, depending on the type of dates you are using, the mixture may be too dry so you may want to add a small amount of melted vegan margarine to help the mixture stick together. (The final ‘dough’ should be squidgy and sticky to touch, but still firm.)
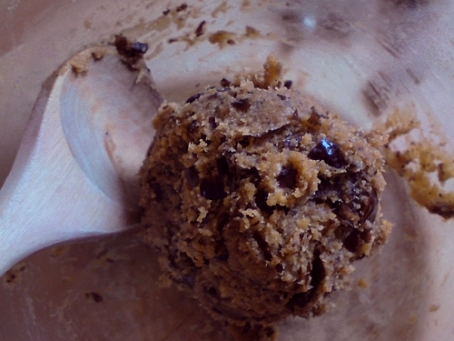
Once the ingredients are properly mixed in and there are no visible biscuity crumbs to be seen, cover a chopping board or other surface in grease proof paper. Tear off small amounts of the ‘dough’ mix and roll in your hand to form a small ball, about the size of a large marble. Place your dumpling on the chopping board or surface, and repeat until all the mixture is used up. ( I made about 16 dumplings).
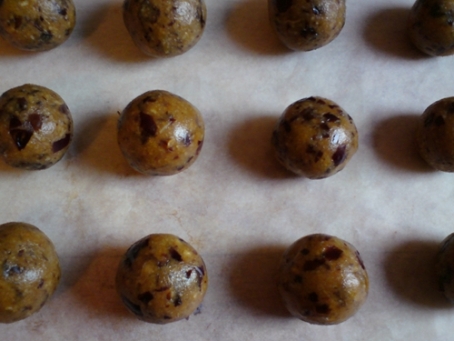
Now, you can either EAT THEM ALL straight away, or if you are more restrained, wrap in grease proof paper and put in the fridge. They can last well for a few days like this, becoming firmer over time.
Egyptian Broad Bean and Fresh Mint Falafel
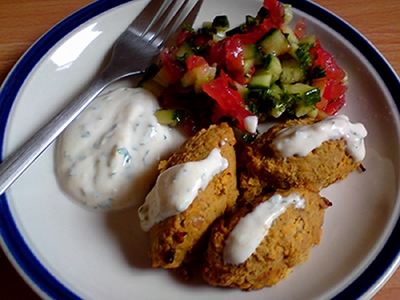
The best falafel I ever ate, came from a small Middle Eastern cafe in Berlin. These hot and crispy chickpea patties, full of delicious herbs and spices, were served with a huge array of sauces and salads. In particular, I remember an amazing taboule, made completely from fresh herbs and diced tomato. All this wrapped up inside a soft, freshly made flat bread (N.B.: this was well before my gluten-free days!). Most people when they think of falafel probably think of something made with chickpeas, similar to what I just described. In fact, they originate in Egypt, where they are made using raw, soaked and ground up broad beans (Foul Medammes) mixed with herbs and spices, and then deep fried. I have stepped away from tradition slightly in my recipe below. The broad beans are first boiled, and the falafel are then later baked, for a healthier twist.
Serve with a simple diced tomato, cucumber and fresh herb salad, and this spicy yoghurt sauce with coriander and lime.
Ingredients
4 cups Broad Beans ( measured after soaking, boiling and removing skins)
3 medium Carrots
1 medium Courgette
1 medium Onion (diced)
4 or 5 Spring Onions
4 Garlic Cloves (finely chopped)
3 tbsp Tamari
2 to 3 tsp Ground Coriander
juice of 2 Lemons
handful Fresh Mint
2 tbsp Tahini
about a 1/4 cup Olive Oil (for drizzling)
Preheat oven to 200ºc
How To Make
Soak the dried broad beans for two days in a bowl of water, rinse and refresh with clean water every now and again. Once the beans are fully re-hydrated, boil on a low heat until tender. Drain and rinse in cold water to stop cooking. Next, remove the outer skins (these should pop off easily if the beans are cooked enough), and discard. The broad beans are now ready to be used.
Into a large bowl grate 2 of the carrots and courgette. Peel and finely slice the spring onions, and add to the bowl along with the onion and garlic.
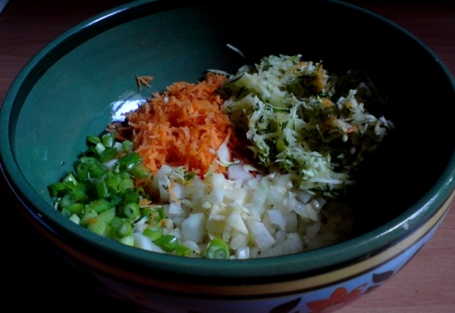
Add the ground coriander, lemon juice and tamari to the mixture, and throw in the fresh mint.
Using a hand blender, blitz the mixture until it is homogenised. Finally, grate in the remaining carrot, and set the mixture aside. (If you have a large blender you can use that instead, I just happen to have a hand-held one.)
Put the broad beans in a separate bowl and blitz to a smooth paste.
Add the vegetable mixture to the bean paste, dollop the tahini on top and stir till completely mixed through.
The resulting batter should be firm enough to hold its shape on a spoon, but still moist. If it is too dry, the falafel will turn out very crumbly; if it is too wet, they will not hold their shape or cook through properly. (If it is too wet, add extra broad bean paste (if there is any spare), or more tahini. If it is too dry, try adding an extra carrot or lemon juice.)
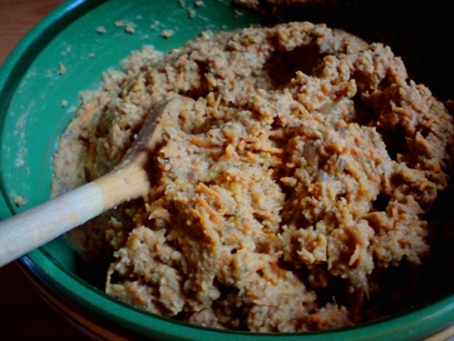
Now, cover the falafel ‘batter’ and place in the fridge for at least an hour.
How To Cook
Cover an oven pan with tin foil ( you can first spray it with water if necessary, to help it stick in place). Drizzle on a small amount of olive oil, making sure all the foil is covered.
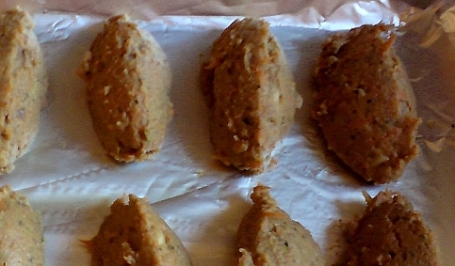
Using a dessert spoon, scoop up some of the falafel mix. Take a second spoon and cup it over the first. From back to front, scrape the mix onto the second spoon in one movement. Repeat this a few times until the falafel becomes something like the shape of a brazil nut: oval, with three flattened sides.
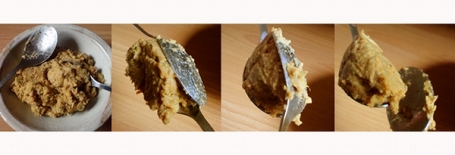
Place the falafel into the prepared oven pan. Repeat this until you have as many falafel as you need.
Bake in the oven for around 20-30 minutes, or until they are fairly firm and golden brown. Remove from the pan with a spatula. (For a crispier but less healthy version you could deep fry these, dropping the shaped batter into very hot oil, until golden brown.)
